
Annature’s Xero integration bridges the gap between your accounting platform and your document signing needs. By connecting contacts and documents in one place, you can send agreements quickly while ensuring they stay linked to the right client or project. Whether it’s onboarding new clients or managing supplier contracts, Annature works behind the scenes to cut down on manual admin and keep everything in sync.
Annature’s Xero integration syncs your Xero contacts into the Annature address book. With Xero connected to Annature, you can create and send envelopes directly, without retyping contact information. Your contacts refresh daily, keeping everything accurate and up to date.
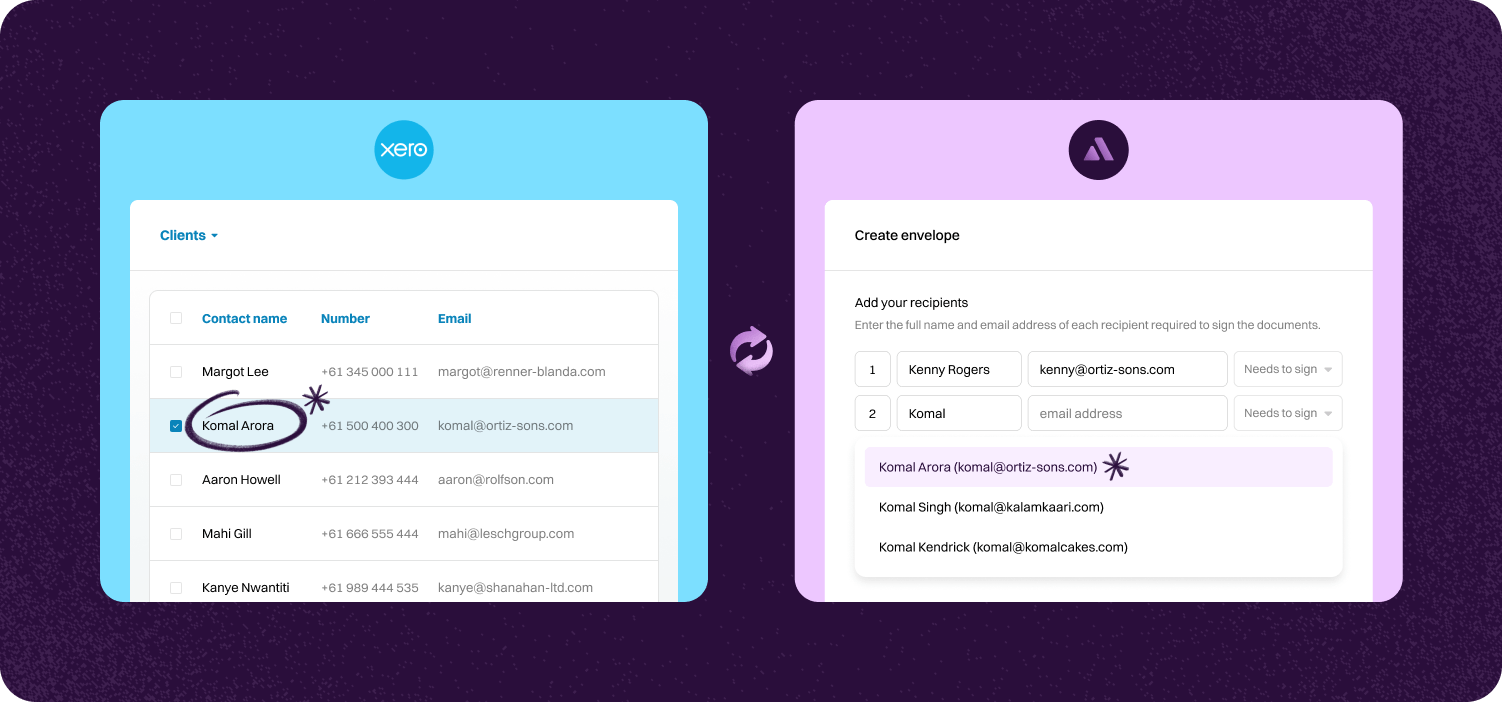
Say goodbye to tedious manual data entry and the errors that often accompany it. Annature’s seamless integration with Xero automatically populates client and contact details from Xero into Annature. This ensures accuracy and efficiency when sending out sensitive financial documents, saving you time and reducing the risk of mistakes.
Effortlessly send, sign, and manage documents securely—all within an integrated platform. Annature enhances your workflow by combining powerful eSigning capabilities with Xero’s robust financial tools. This unified solution simplifies your processes, allowing you to focus more on your clients and less on administrative tasks.
Protect your clients’ sensitive information with Annature’s secure document handling integrated with Xero. By managing all activities within this trusted environment, you maintain high security standards and compliance. This integration provides peace of mind for both you and your clients, ensuring that financial documents are handled with the utmost care and confidentiality.
Step-by-step guide to linking account.

Next, Click Connect under Xero.
You'll be redirected to your Xero account. Log in to your account if you aren't logged in already.

You will be prompted to allow Annature access to your Xero account. Simply click on Allow access to complete the connection.
Shortly after you will be returned to the Annature integrations page, and the Xero integration card will be updated to show that Xero has now been connected.
Lastly, click Import contacts. A window will appear asking if you want to share the contacts with other users in your organisation or group. If you prefer not to share them, click Continue. Otherwise, you can select the sharing option that suits your needs by toggling the switch beside it.

Annature auto-syncs client and contact data from XPM. When you send documents or agreements from Annature, names, email addresses, and mobile numbers are auto-populated, reducing the chance of manual errors.

Yes. Our integrations are designed to be straightforward, so you don’t need IT expertise to get started.
Absolutely! Developers can use our API to create custom workflows that fit seamlessly into their systems.
Yes. With built-in integrations and API support, you can connect Annature directly to your business systems.
Annature integrates with popular platforms and payment providers, and we’re continually expanding our partner network.


