
Annature seamlessly integrates with Xplan to streamline client management and document handling for financial services professionals. Manage envelopes and identity verifications directly from your Xplan dashboard, with automatic syncing and pre-filled client information—making your workflow more efficient and client-focused.
Annature’s integration with Xplan streamlines client management and document handling for financial services professionals. From your Xplan dashboard, you can create envelopes, initiate identity verifications, and manage synced client details without leaving the platform.
Simplify your client management by connecting Annature directly with Xplan. This seamless integration allows financial professionals to handle all client-related activities—including envelopes and identity verifications—right from the Xplan dashboard. Save time and reduce administrative tasks by keeping everything in one centralized location.
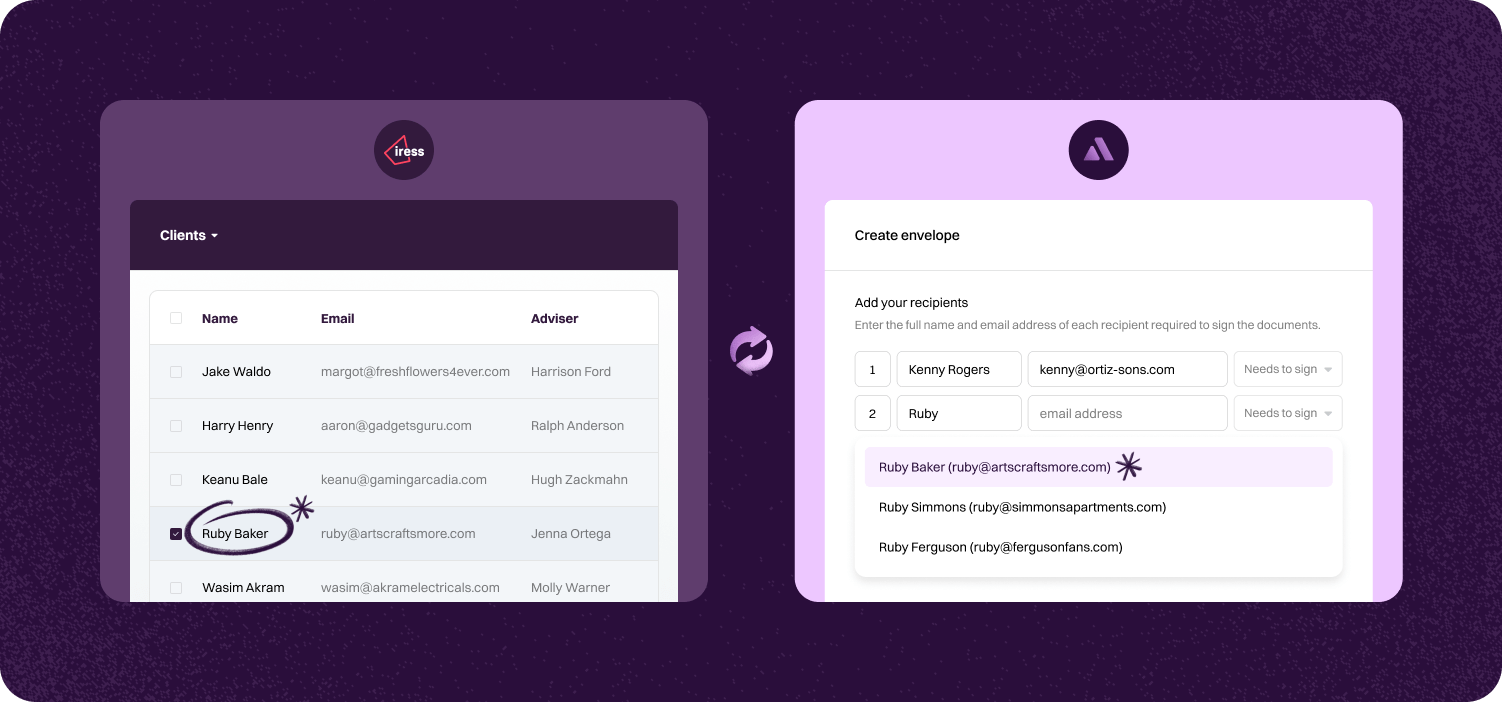
Creating envelopes and initiating identity verifications for your Xplan clients has never been easier. From the Xplan integration page, simply select a client and click Create Envelope or Create Verification. Annature automatically populates recipient details with the selected client’s information, eliminating manual data entry and minimizing errors.
Annature’s integration with Xplan automates the syncing of client data, envelopes, and identity verifications. This automation ensures that all your information is up-to-date across platforms, enhancing efficiency and allowing you to focus more on providing exceptional financial services rather than managing data.
Step-by-step guide to linking account.

To connect Xplan, go to Settings and click Integrations.
Next, Click Connect under Xplan.


Enter your Xplan account's site URL. This is the web address you use to sign in to your Xplan account e.g. https://annature.xplan.iress.com.au.
After entering the URL, click on Continue and you will be redirected to your Xplan account. Log in to your account if you aren't logged in already.


Finally, you will be prompted to allow Annature access to your Xplan account. Simply click on Allow to complete the connection.
Once connected, Xplan will be added to the dashboard's left-hand menu. This is where you can access all your Xplan clients and view any envelopes or identity verifications associated with them.

Yes. Our integrations are designed to be straightforward, so you don’t need IT expertise to get started.
Absolutely! Developers can use our API to create custom workflows that fit seamlessly into their systems.
Yes. With built-in integrations and API support, you can connect Annature directly to your business systems.
Annature integrates with popular platforms and payment providers, and we’re continually expanding our partner network.


